


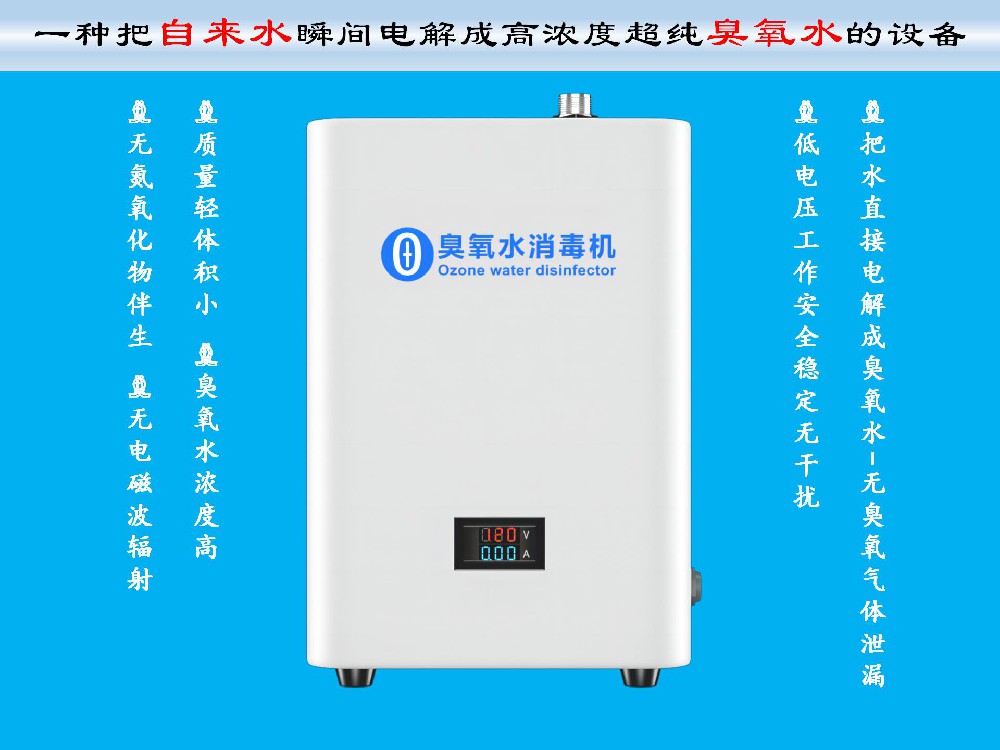
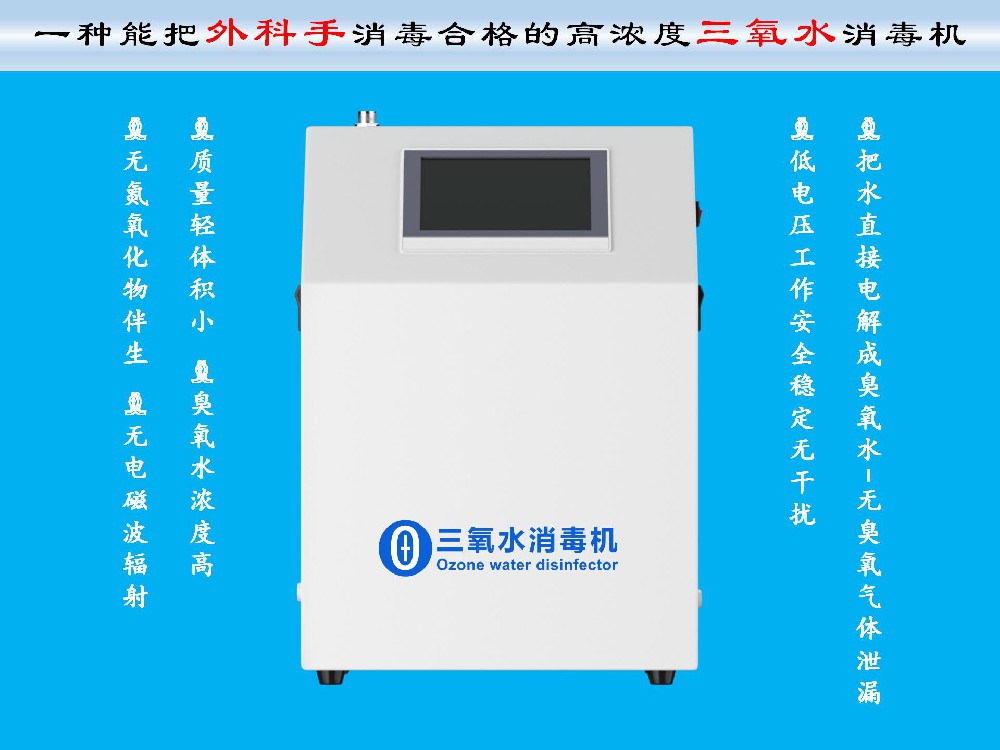
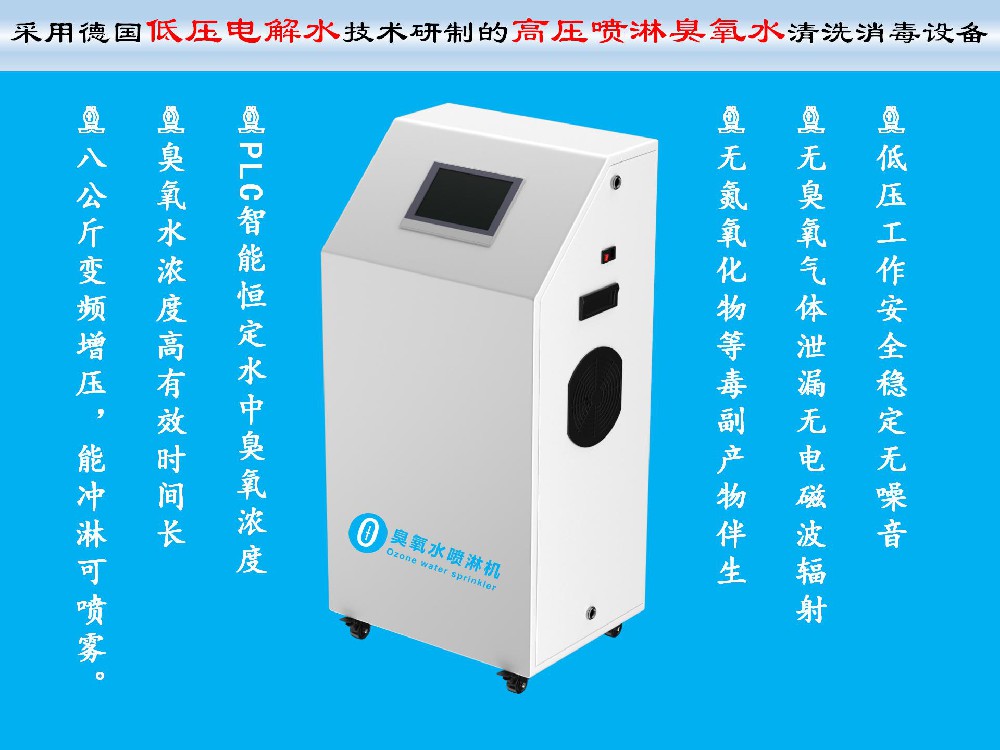
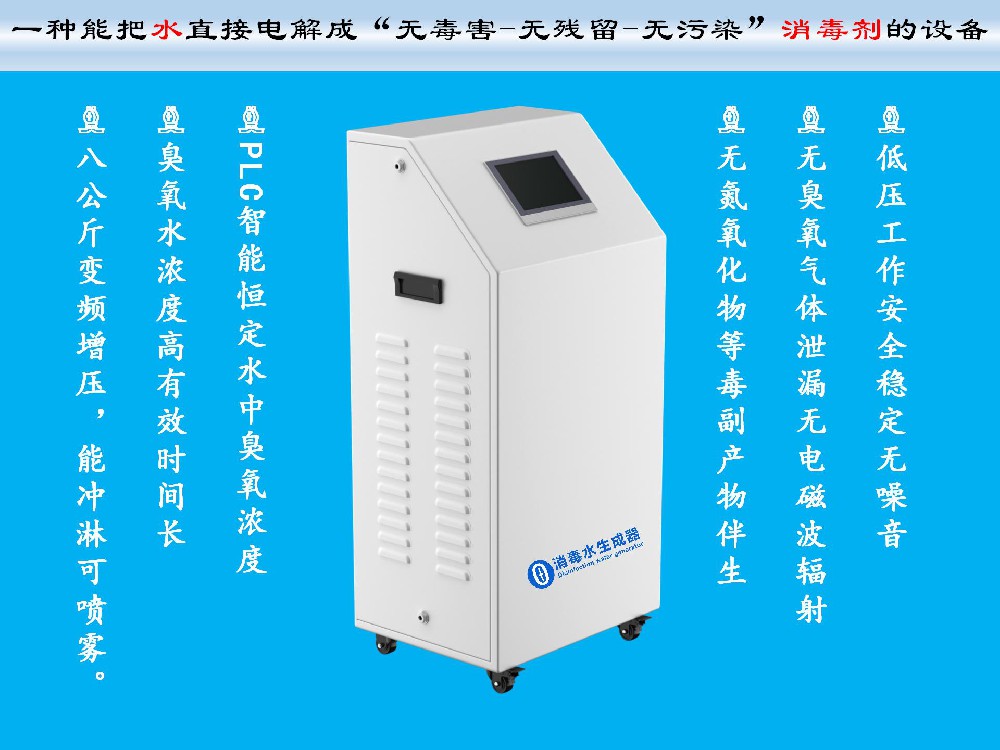
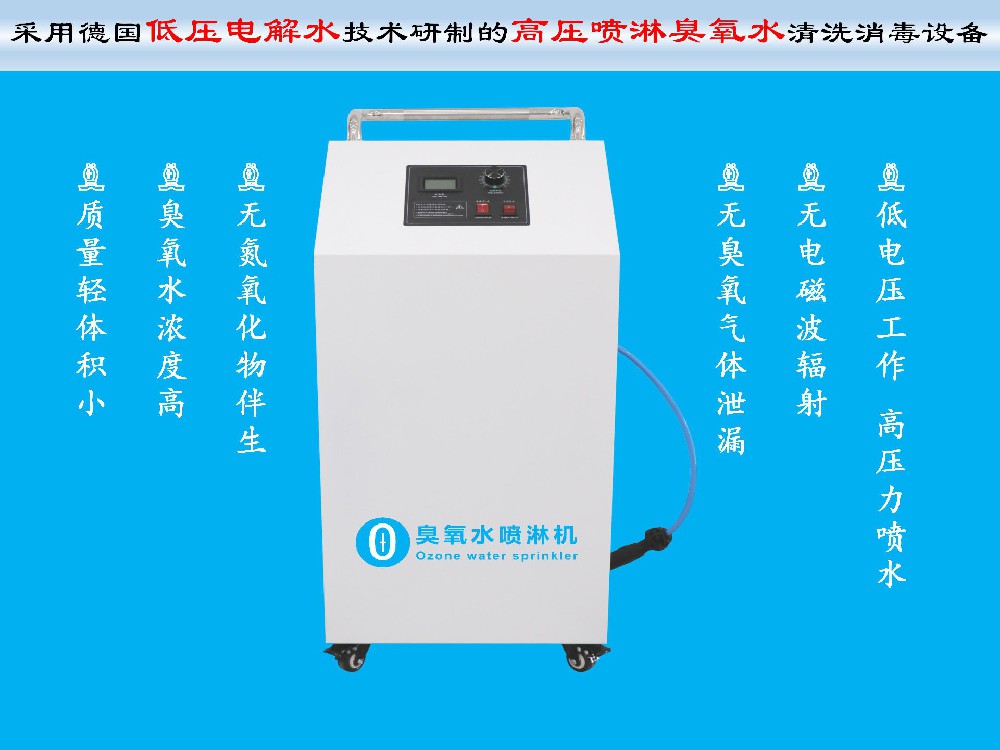
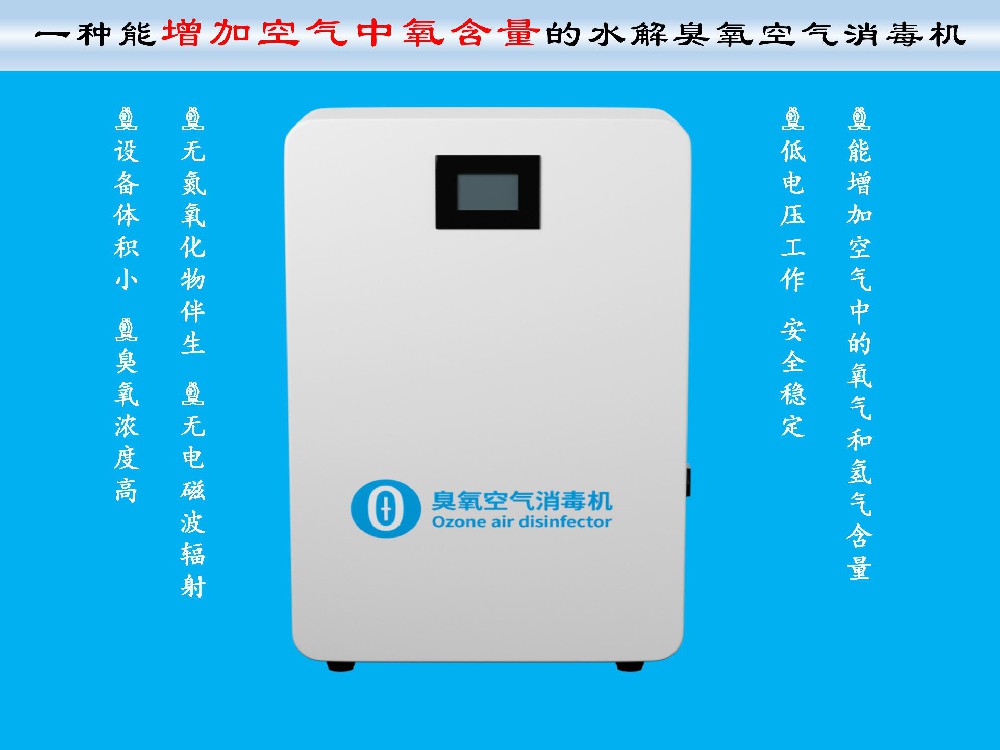
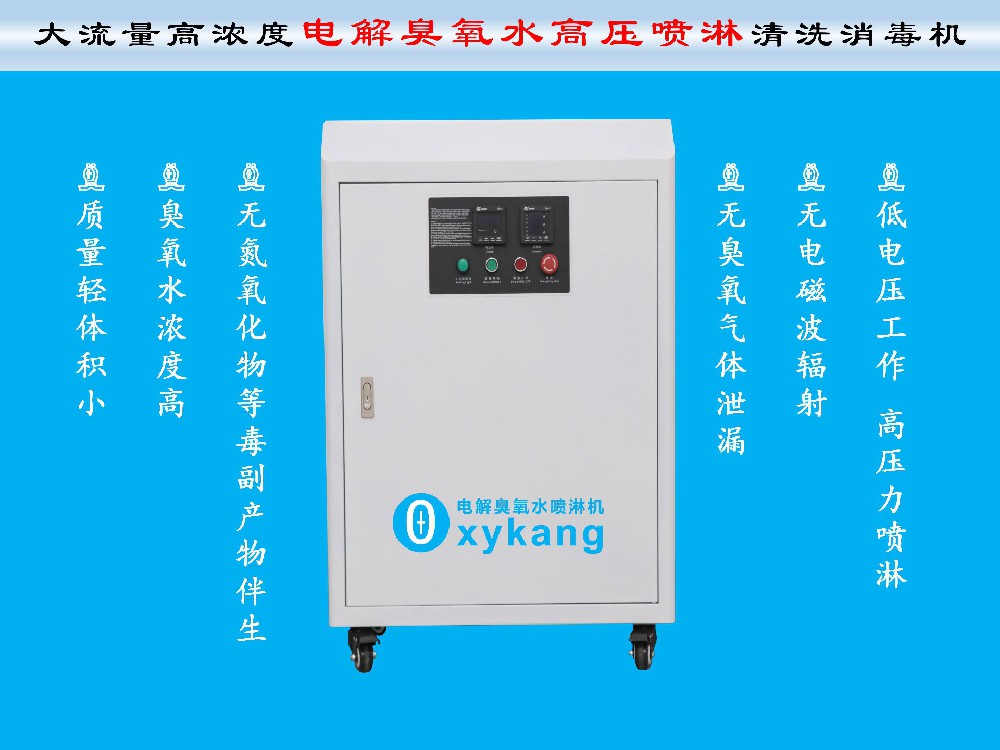
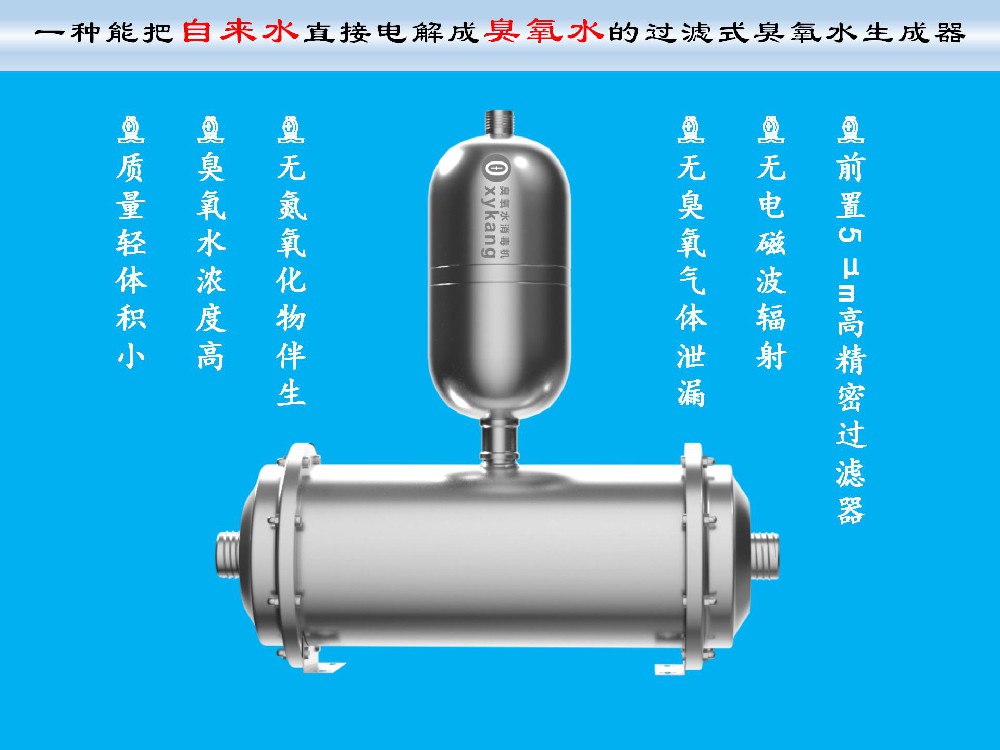


-
2025-03-03将海水电解成无菌水用于养殖有以下几方面的好处:1. **无菌环境**-**减少病害**:无菌水能显著降低病原体和有害微生物,减少养殖生物的疾病风险。**提升存活率**:清洁的水环境有助于提高养殖生物的存活率。2. **水质稳定**-**可控性强**:电解水的水质稳定,便于监控和调整,确保养殖环境始终处于最佳状态。**...
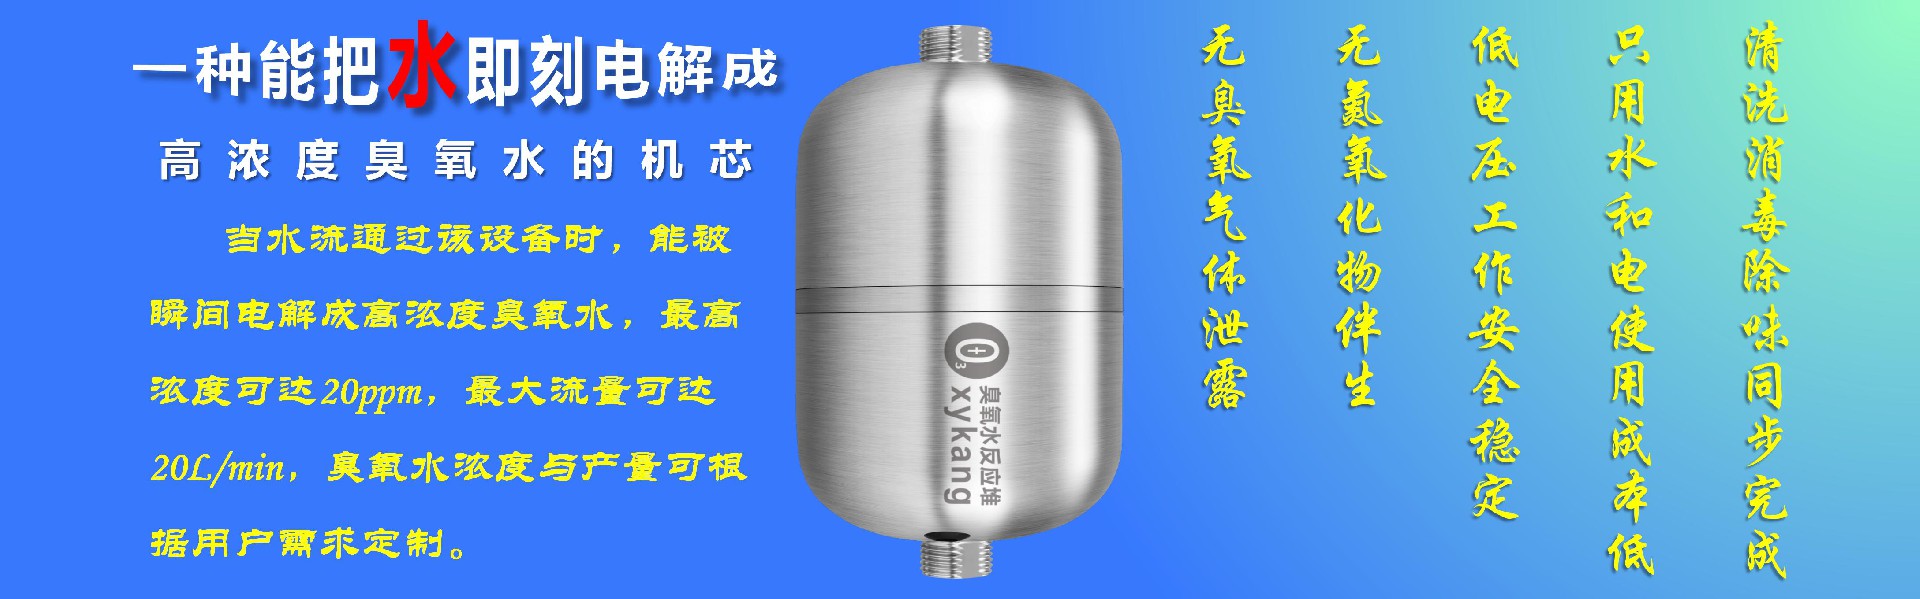
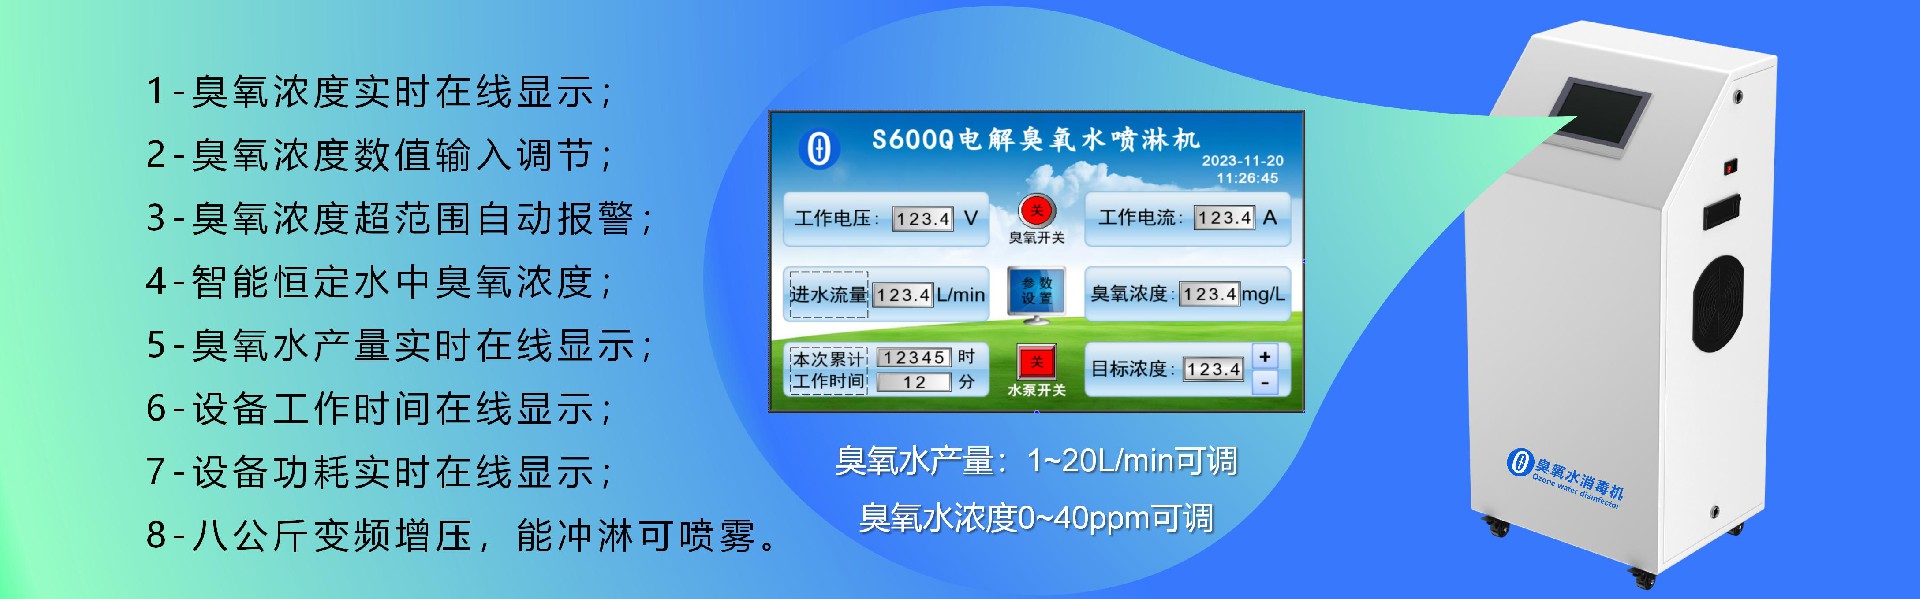
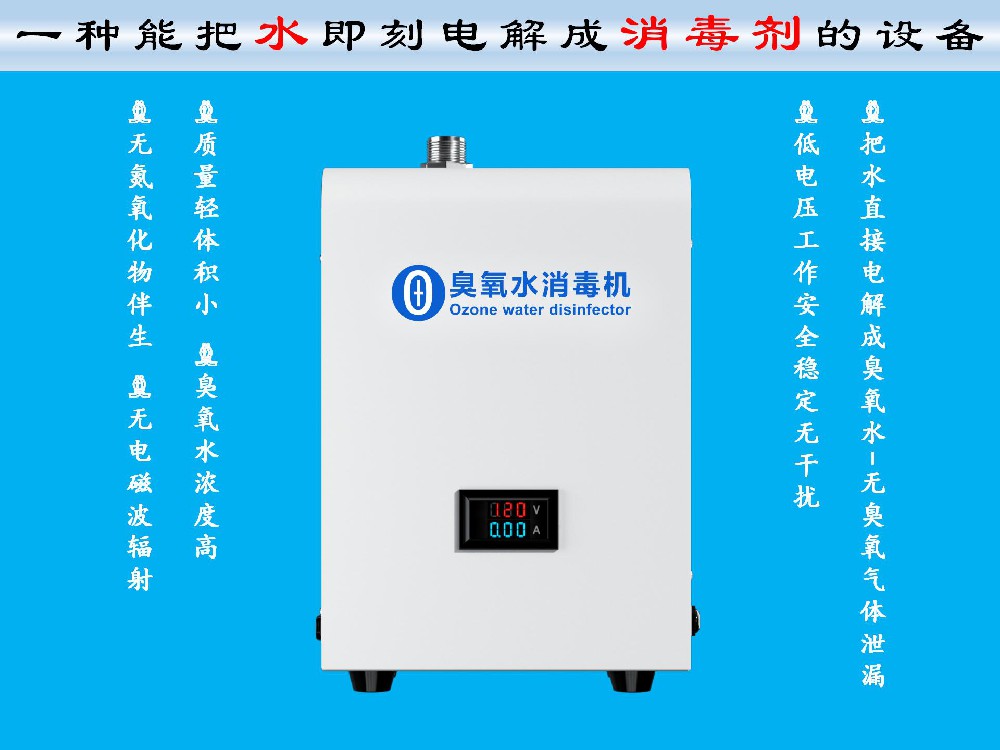
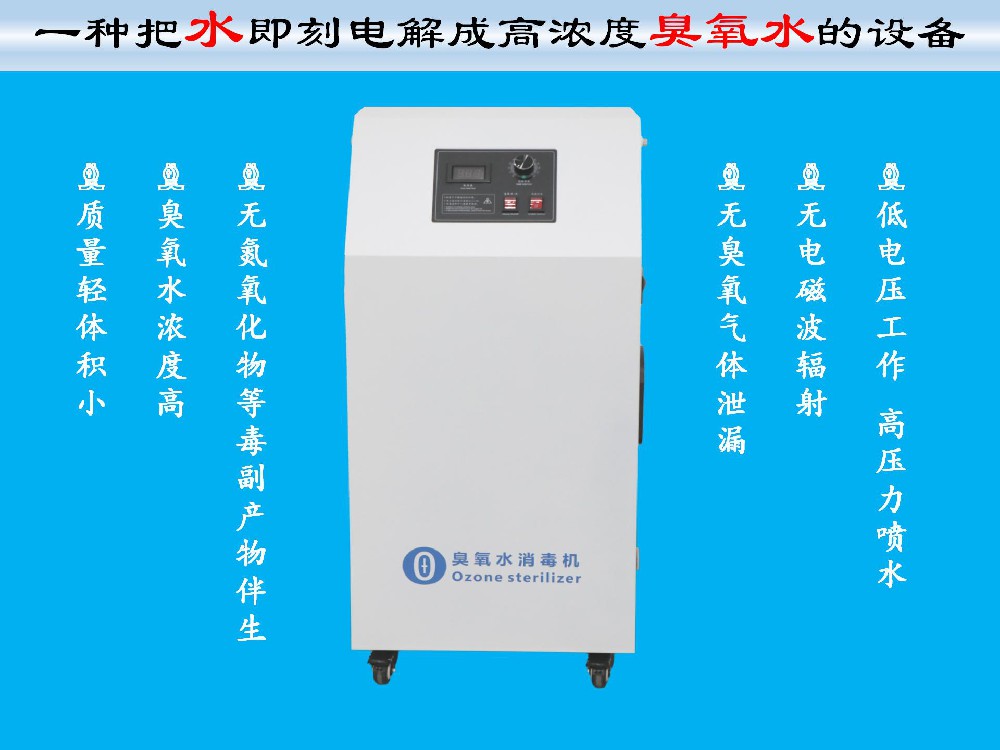
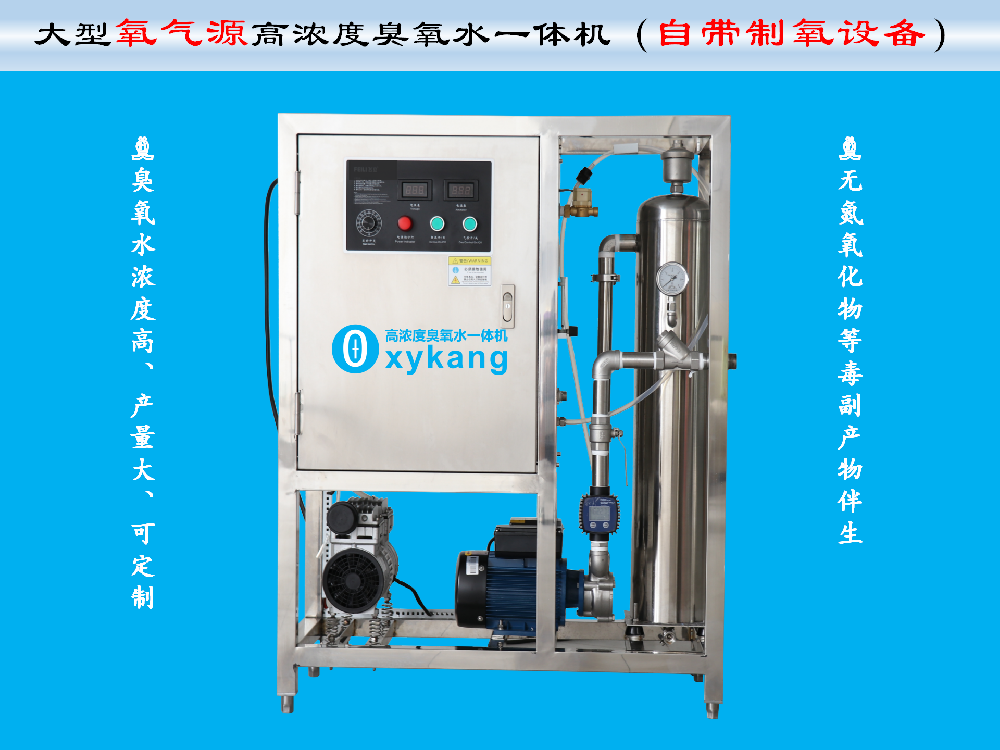
 2025-03-01无隔膜BDD臭氧电极是一种基于掺硼金刚石(Boron-Doped Diamond, BDD)材料的电化学传感器,专为电解水生成臭氧(O₃)而设计。与传统有隔膜电极相比,无隔膜设计具有显著优势,适用于多种应用场景,使用寿命大大延长,可轻松超过10000小时。以下是其主要优点:1. **简化结构,易于维护**:无隔膜设计去除了传统...
 2023-02-152021年两会再次强调了中国将努力实现更加可持续的增长发展轨迹,继续建设持续创新和绿色经济。针对生态环境、产业行业和社会理念三个层面的“绿色”和可持续发展,将是未来的政府工作重点并将成为影响各行业未来发展的重要因素。从长远来看,绿色、环保是大势所趋,企业在可持续发展、环保方面应该承担更多的社会责任,大力...
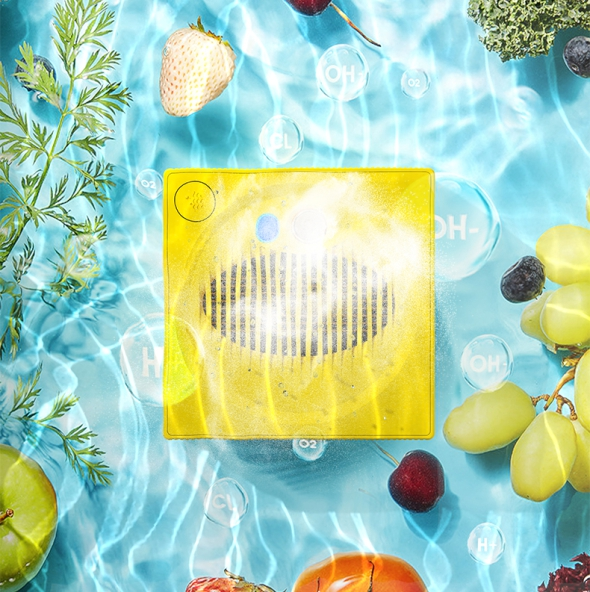
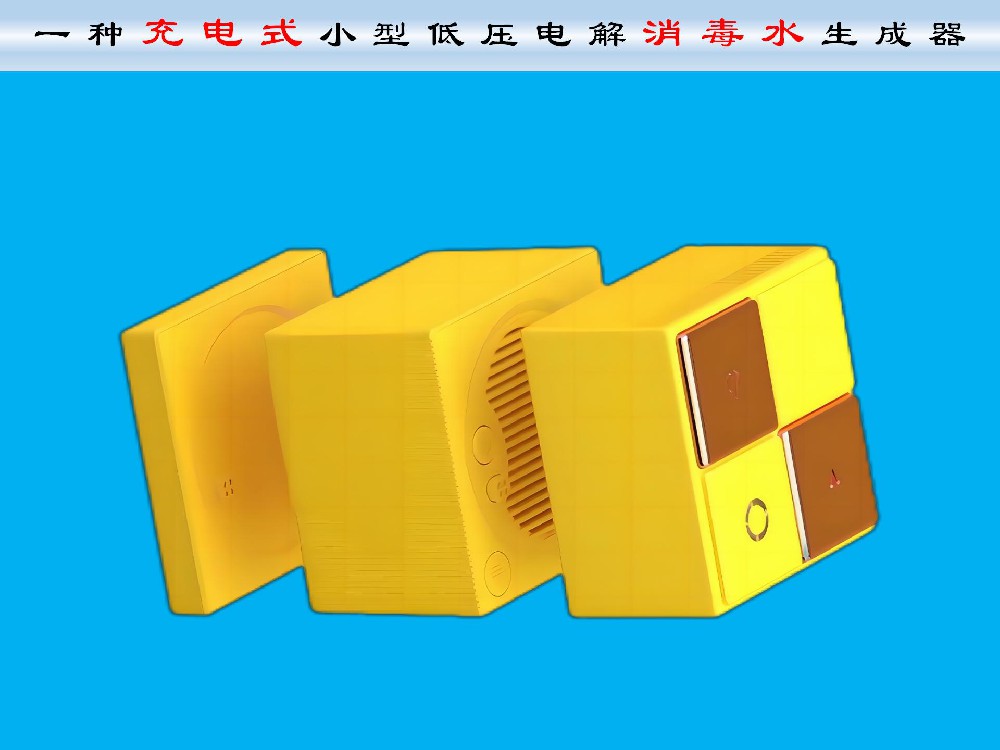
 2023-06-25E8魔方充电式消毒器是由小型臭氧生成器和小型低压电解消毒水生成器两台独立的消毒机组成,分别用于小型空间的空气消毒和物体表面消毒,也可用于水的消毒,真正实现了一机两用。现面向同行或终端客户提供OEM贴片定制服务,欢迎来电咨询。...